How to Remove Mold from Your Ceiling: The Smart Way
Ever looked up and noticed strange dark spots on your ceiling, as if it's trying to start its own art exhibit? Mold on the ceiling is not just a decorative disaster - it's a sign that something bigger might be brewing in your home. Often fueled by condensation of moisture and poor ventilation, mold thrives in the exact places you least want it. But before you grab your cleaning supplies to remove mold from the ceiling, it's important to take a step back and evaluate the situation.
This guide will help you understand what ceiling mold really is, how to recognize it, what you should consider before starting the removal process, and what your very first step should be to tackle the problem safely and effectively.
Why Does Mold Appear on Ceilings?
It's not just bad luck when you find a mold colony on your ceiling - it's science. Ceilings are prime real estate for microbial growth, especially when conditions like high humidity and poor ventilation create a perfect storm.
Humidity Control Issues and Poor Ventilation
Bathrooms and kitchens, the usual suspects, are hotspots for microbial growth. With steam from showers or boiling pots lingering in the air, moisture tends to condense on ceiling surfaces. Pair that with poor ventilation, and you've got yourself a breeding ground for mold. Without proper humidity and moisture control, it's only a matter of time before mold decides to settle in.
Hidden Mold in Attic
Attics are another frequent offender when it comes to hidden mold. Roof leaks, cracked shingles, or poorly sealed vents can introduce moisture into your attic without you realizing it. What's worse, mold in the attic can easily spread to the ceiling below, turning a small problem into a widespread issue.
Limited ventilation and trapped heat in the attic provide the perfect conditions for a fungus colony to thrive, eventually finding its way into your living spaces. By the time you notice mold on the ceiling, the damage might already have traveled further than expected.
How to Identify Mold on Ceiling: Key Indicators to Watch For
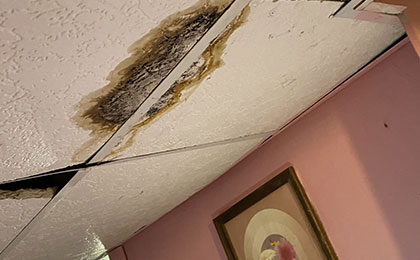
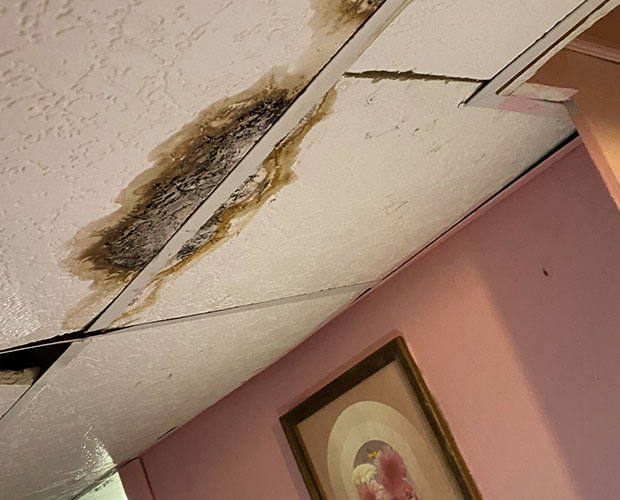
Spotting mold on your ceiling isn't always straightforward, especially when the signs are subtle or easily mistaken for dirt or stains. One of the most common indicators is the presence of irregular dark spots or streaks that stubbornly return even after a thorough cleaning. These blemishes can vary in color, from deep black to brown, and tend to appear in areas where the ceiling slopes or curves, making them harder to notice at first.
Curiously, these spots often don't feel damp to the touch, adding to their deceptive nature. They can form even in homes with no visible moisture issues or smoking habits, making them easy to overlook. The persistence of these marks, despite repeated cleaning, is often a strong clue that mold is taking hold beneath the surface - likely driven by underlying moisture problems that need attention.
The Way to Remove Mold from Your Ceiling in 5 steps
Step 1: Evaluate the Threat
Before tackling mold removal yourself, take a moment to evaluate the situation. A proper assessment not only addresses the visible issue but also its underlying causes, ensuring the mold doesn't return.
- Measure the Area: If the affected area exceeds 10 square feet, it's best to call a professional. Larger infestations, especially black mold, release significant spores into the air, increasing health risks and complicating cleanup.
- Know Your Ceiling's Material: The type of ceiling dictates your approach. Mold on popcorn ceiling clings to textured surfaces, while mold on drywall penetrates deeper, often requiring more than surface-level cleaning. Understanding the material can help you decide whether DIY efforts are sufficient.
- Look for Hidden Mold: Mold often hides in attics or crawl spaces, where poor ventilation fosters its growth. These colonies can spread to any ceiling and wall, turning a small issue into a larger problem. Signs like musty odors or discoloration indicate it's time to act.
- Consider Health Risks: Mold, particularly toxic types, can cause respiratory issues, skin irritation, and allergic reactions. If household members are sensitive to mold or if safety is a concern, professional assistance is highly recommended.
If any of these factors apply, consulting a professional mold remediation company is the safest option. Mold Act is here to help, ensuring effective solutions for even the toughest situations. However, if your concerns are minimal, the following steps will guide you through the process with confidence. Let's get started!
Step 2: Prepare Your Tools and Safety Gear
So, you have evaluated everything and decided to proceed on your own. Here are several steps to ensure you stay safe and handle the task properly:
- Use a Sturdy Ladder: First things first, ensure you have a stable ladder. Without it, reaching the ceiling safely is impossible, and your mold removal efforts may fail before they even begin.
- Wear Protective Goggles: Mold spores can become airborne while cleaning and irritate your eyes. Proper goggles will protect you from potential harm.
- Don't Skip a Protective Mask: Some N95 masks might not provide enough protection if you are working on multiple moldy spots. Consider investing in a higher-grade mask to safeguard your respiratory system.
- Put on Rubber Gloves: These are essential for protecting your hands from mold spores and cleaning solutions. Never skip this step, as direct contact with mold can cause skin irritation or allergies.
Step 3: Fix the Root Cause
Cleaning the mold without addressing its root cause is like treating a symptom without curing the illness. Mold thrives where moisture lingers, so it is essential to identify and repair the issues contributing to the problem.
- Repair Leaks and Condensation: Start by fixing any leaky pipes, roof damage, or areas prone to condensation.
Without resolving the underlying causes, any mold removal efforts will only provide temporary relief, as the problem is likely to return.
Step 4: Clean the Mold
Using the right products and techniques is essential for safety and effectiveness. Now, let's go through a process designed for small areas on non-porous surfaces.
- Commercial Mold Cleaners: Products like Concrobium or Mold Armor are designed to kill and clean mold off. Apply the cleaner using a dampened cloth or sponge, not a sprayer, to avoid spreading mold spores through the air. Wipe the surface thoroughly and dry it completely.
- Distilled Vinegar: The acidity in vinegar makes it a natural and effective option for killing mold. Spray undiluted vinegar onto the moldy surface, let it sit for about an hour, and then scrub it off with a damp rag or sponge. Vinegar can effectively address symptoms of mold, but without addressing the moisture problem, the mold will return.
- Avoid Bleach: Bleach is not as effective as many believe. It doesn't kill mold, it merely lightens the stains. While it can remove discoloration, it won't address the underlying growth, especially on porous surfaces. Using diluted bleach is even less effective, as fungus thrives in damp environments. Products containing sodium hypochlorite (like some stain removers) may remove visible signs of mold but do not eliminate the spores.
Step 5: Preventing Mold on Ceiling
The best solution to mold is prevention. Here are some practical advices:
- Improve Ventilation: Moisture can accumulate on ceiling due to poor ventilation or the absence of an exhaust fan, especially in bathrooms and kitchens. These planning oversights often allow humidity to concentrate in one area, creating the perfect conditions for mold to grow on ceiling. Open windows periodically to allow fresh air to circulate. Use exhaust fans or install a dehumidifier to reduce indoor humidity levels below 50%.
- Regular Cleaning and Maintenance: Clean and dry areas prone to moisture to stop microbial growth before it starts. Regularly check for and repair leaks in pipes, roofs, and windows.
Don't Let Ceiling Mold Start a Countdown to Disaster
Removing mold from your ceiling isn't just another weekend DIY project - it's a task that demands careful evaluation and respect.
Before you climb that ladder armed with vinegar and good intentions, think twice. Mold removal can be manageable under certain conditions: when the affected area is small, the material is non-porous, and you're confident that the mold is confined to that specific spot. However, if there's even a hint that the problem extends beyond the ceiling or involves hidden areas, it's time to call in the pros.
Underestimating the seriousness of mold could invite risks not only to your home's integrity but also to your health.
Professional mold remediation isn't just about removing visible patches, it's about uncovering hidden colonies that could be lurking in your attic, crawl space, or walls, waiting to wreak havoc. Even if it's "just a tiny patch", calling in Mold Act can stop the countdown that started the moment you noticed mold on your ceiling - because what looks like a minor stain now could turn into a full-blown disaster later.
So, why not call us? We'll handle the dirty work and leave your ceiling (and your peace of mind) spotless.


Mold Remediation Services

